Navigations, shortcuts, settings and co.
Introduction
To speed up your recording and editing work, Ultraschall provides numerous shortcuts that make your work easier. In this chapter you will learn how to use the shortcuts already provided - and how to set up your own shortcuts.
Ultraschall presets
Note for Ultraschall veterans: Unlike in previous versions, quite a few keyboard shortcuts are now globally available. Where keyboard shortcuts used to depend on which programme area had the focus at the time, since version 5 many shortcuts are set to always work. This should solve typical problems - such as no marker being set after pressing M because you last clicked on something in the soundboard.
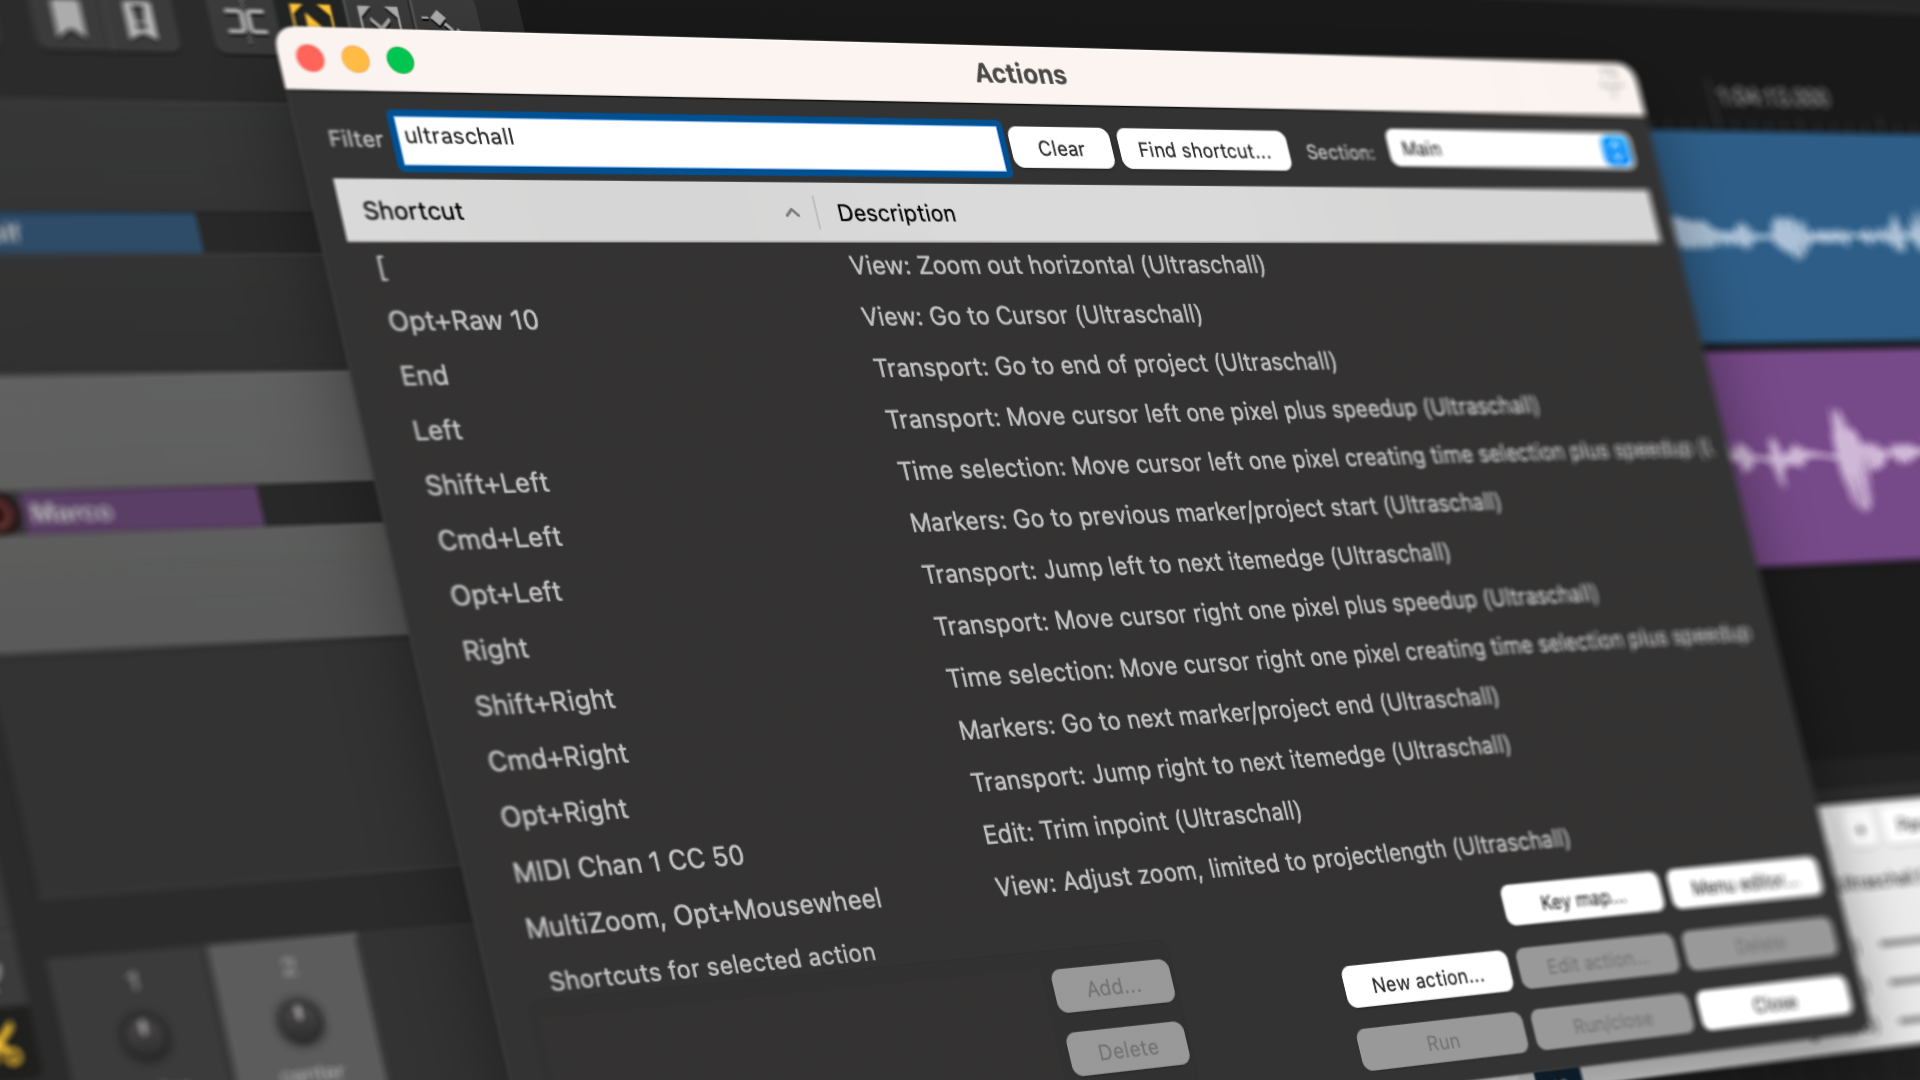
Overview of all shortcuts: In the new menu item Podcast>Help and Documentation you will find an automatically generated, sorted list of all active shortcuts and mouse modifiers.
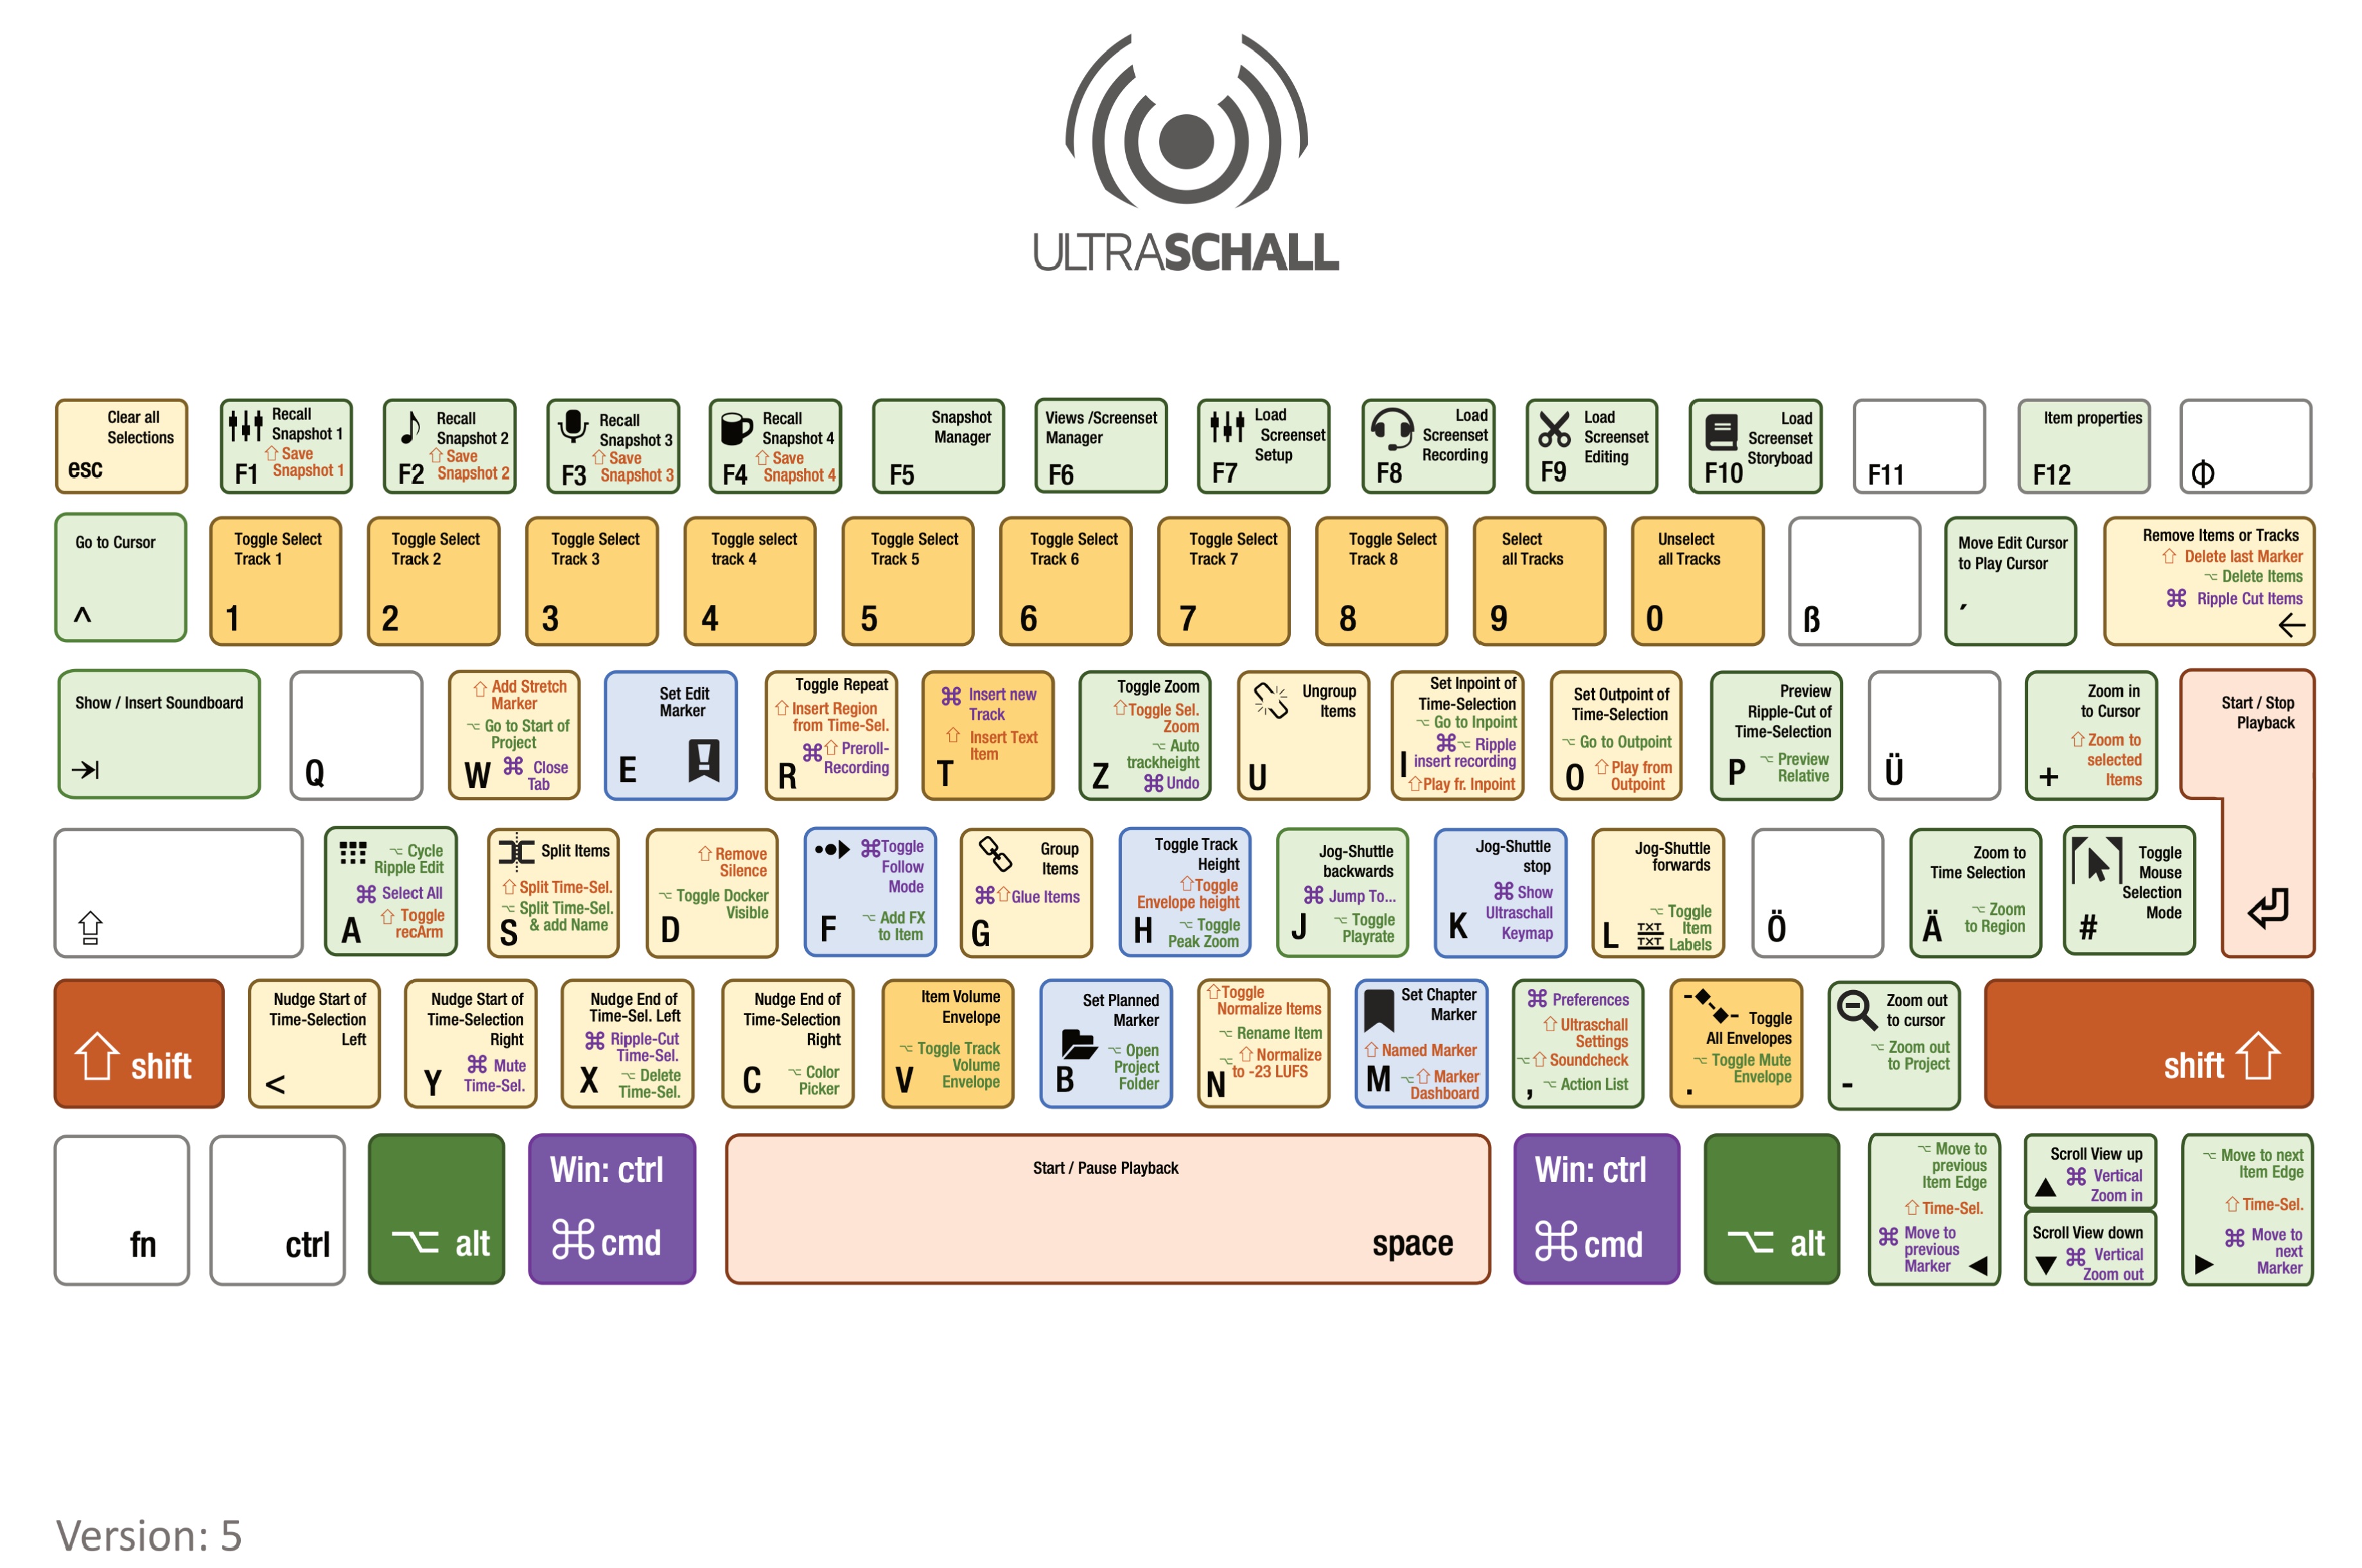
Updated keyboard template: All relevant shortcuts can be found in this handy PDF:
Close current project tab: On the Mac, close the tab of the currently open project by default with Cmd + W.
Dynamic Split Items: The function Dynamic Split Items is now again directly accessible via the keyboard shortcut Cmd/Ctrl + Shift + D.
Normalisation: Use Alt + Shift + N to normalise all selected items to -23 LUFS. With Cmd/Ctrl + Shift + N you cancel any normalisation.
Navigation
Trackpad/mouse wheel functions: Unfortunately, trackpads and the mouse wheel sometimes get in each other's way. The mouse wheel now has the following assignments, which can also be found in almost all other editing programmes:
- Scroll: vertical scrolling of the timeline-workspace [25].
- Scroll while holding Shift key: horizontal scrolling of the timeline-workspace [25]
- Scroll while holding Opt/Alt key: horizontal zoom.
- Scroll while holding Cmd/Ctrl key - vertical zoom.
- Click: sets the edit cursor without selecting tracks or items.
- Click and Drag: freely move the timeline workspace [25]
Check cuts: The shortcuts Alt + Cmd/Ctrl + ← and Alt + Cmd/Ctrl + → set the playbackcursor to the next item edge (on selected tracks only); the cursor then jumps back by the value specified in the Ultraschall settings for previews and starts the playback process - perfect for quickly checking all cuts in a project.
Zoom to selection and back: The shortcut Shift + Z zooms the view to a time selection or to the selected items. The selection is then cancelled. Pressing it again returns the view to the original zoom level.
**Zoom to edit cursor: Cmd/Ctrl + pin on the trackpad does not zoom to the position of the mouse pointer, but to that of the edit cursor.
Use your own shortcuts
To access the menu for the shortcuts, open the 'Actions' dialogue from the menu 'Actions' > 'Show action list'. Here you can customise the shortcuts if the default Ultraschall settings do not suit you for some reason.
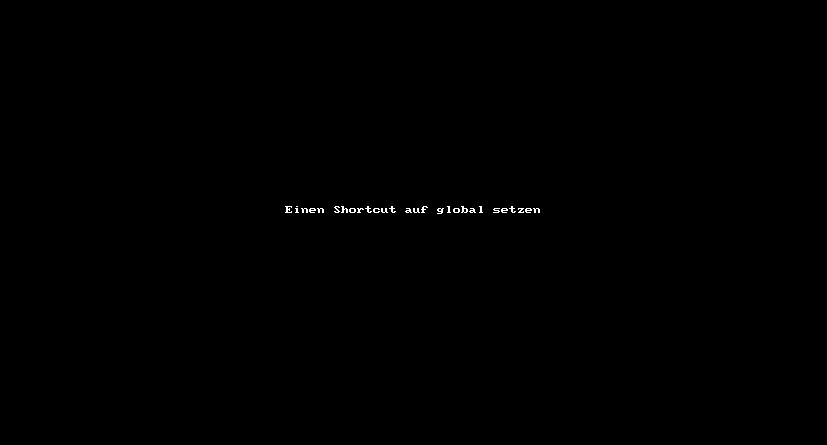
Global shortcuts
In this example, we create the new shortcut Alt + Input, which should open the Project Settings. To do this, find the corresponding action - in the example Project Settings - and click the Add... button to call up the Keyboard/MIDI/OSC Input dialogue for specifying a shortcut. First type in the shortcut you want to use in the future and then select 'Global' from the 'Scope' drop-down list. After confirming with OK, your new shortcut is available everywhere in Ultraschall. (You will know it is global when the keyword "(global)" appears after the shortcut at the bottom of the list).
It is important to make sure that you do NOT select 'Global + text fields' in the scope selection list, otherwise your shortcut will be triggered even if you type in text somewhere (for example, when naming chapter markers). And that is usually not what you want.
Create and use your own shortcuts
In this example, we change the shortcut Alt + Enter we have just set so that it is not set globally, but only works when the keyboard focus is on the Tracks [23] or the Mixer [24]. For this purpose you will find the handy button 'Find shortcut' in the 'Actions' dialogue. There you enter the shortcut and land in the action linked to it. There you basically do the same as before with the assignment: You click on Add... and enter the shortcut again, i.e. here Alt + Enter. Please make sure that Normal is selected in the Scope drop-down list. Then confirm with OK.
You can tell that your shortcut is set correctly when there is NO "(global)" after the shortcut name in the shortcut list at the bottom.
Ultraschall Settings
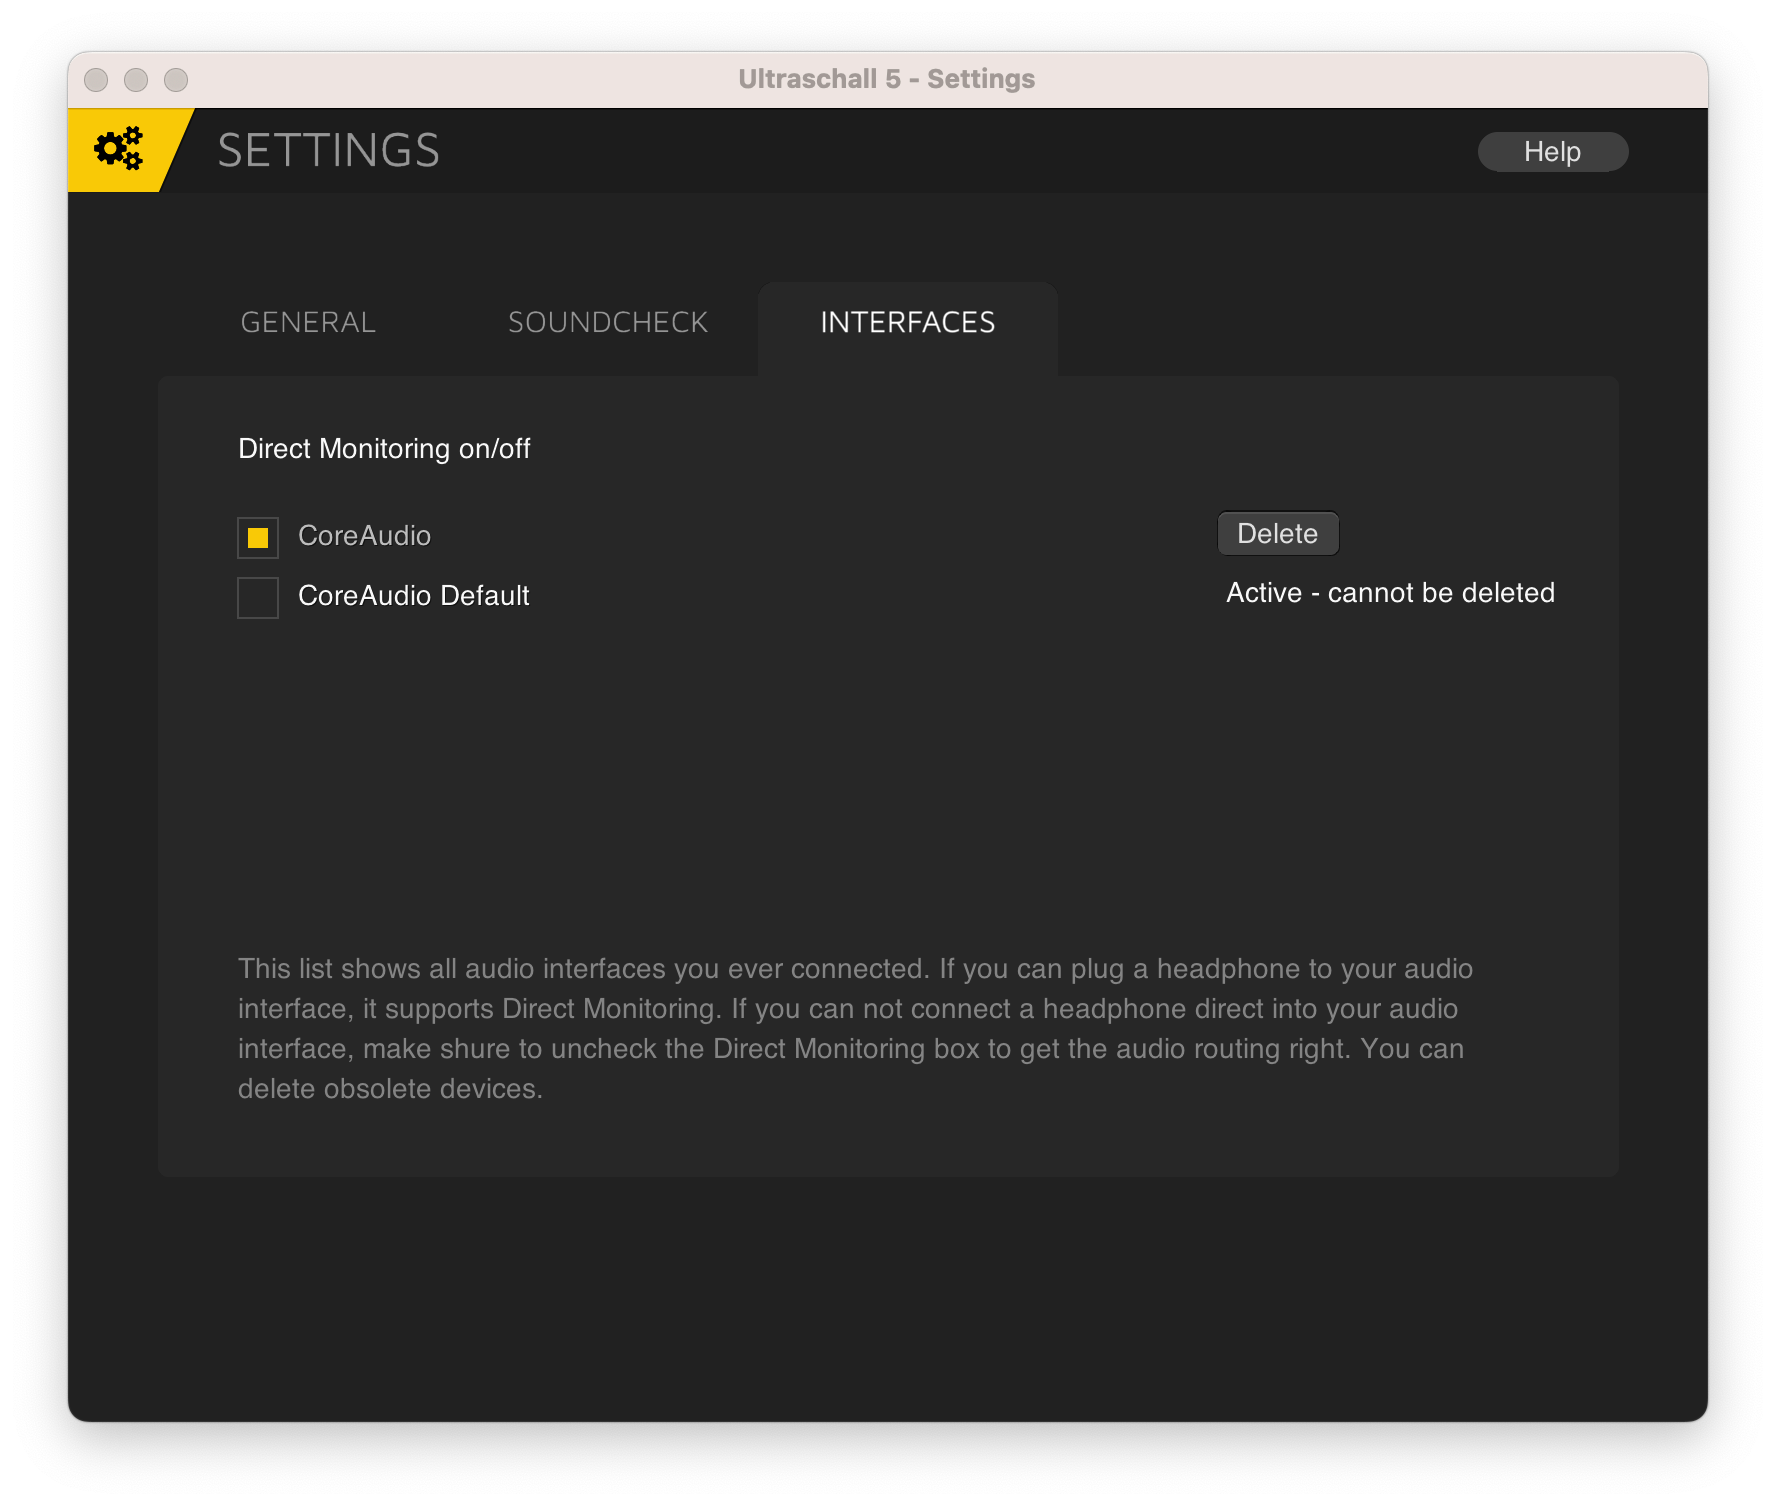
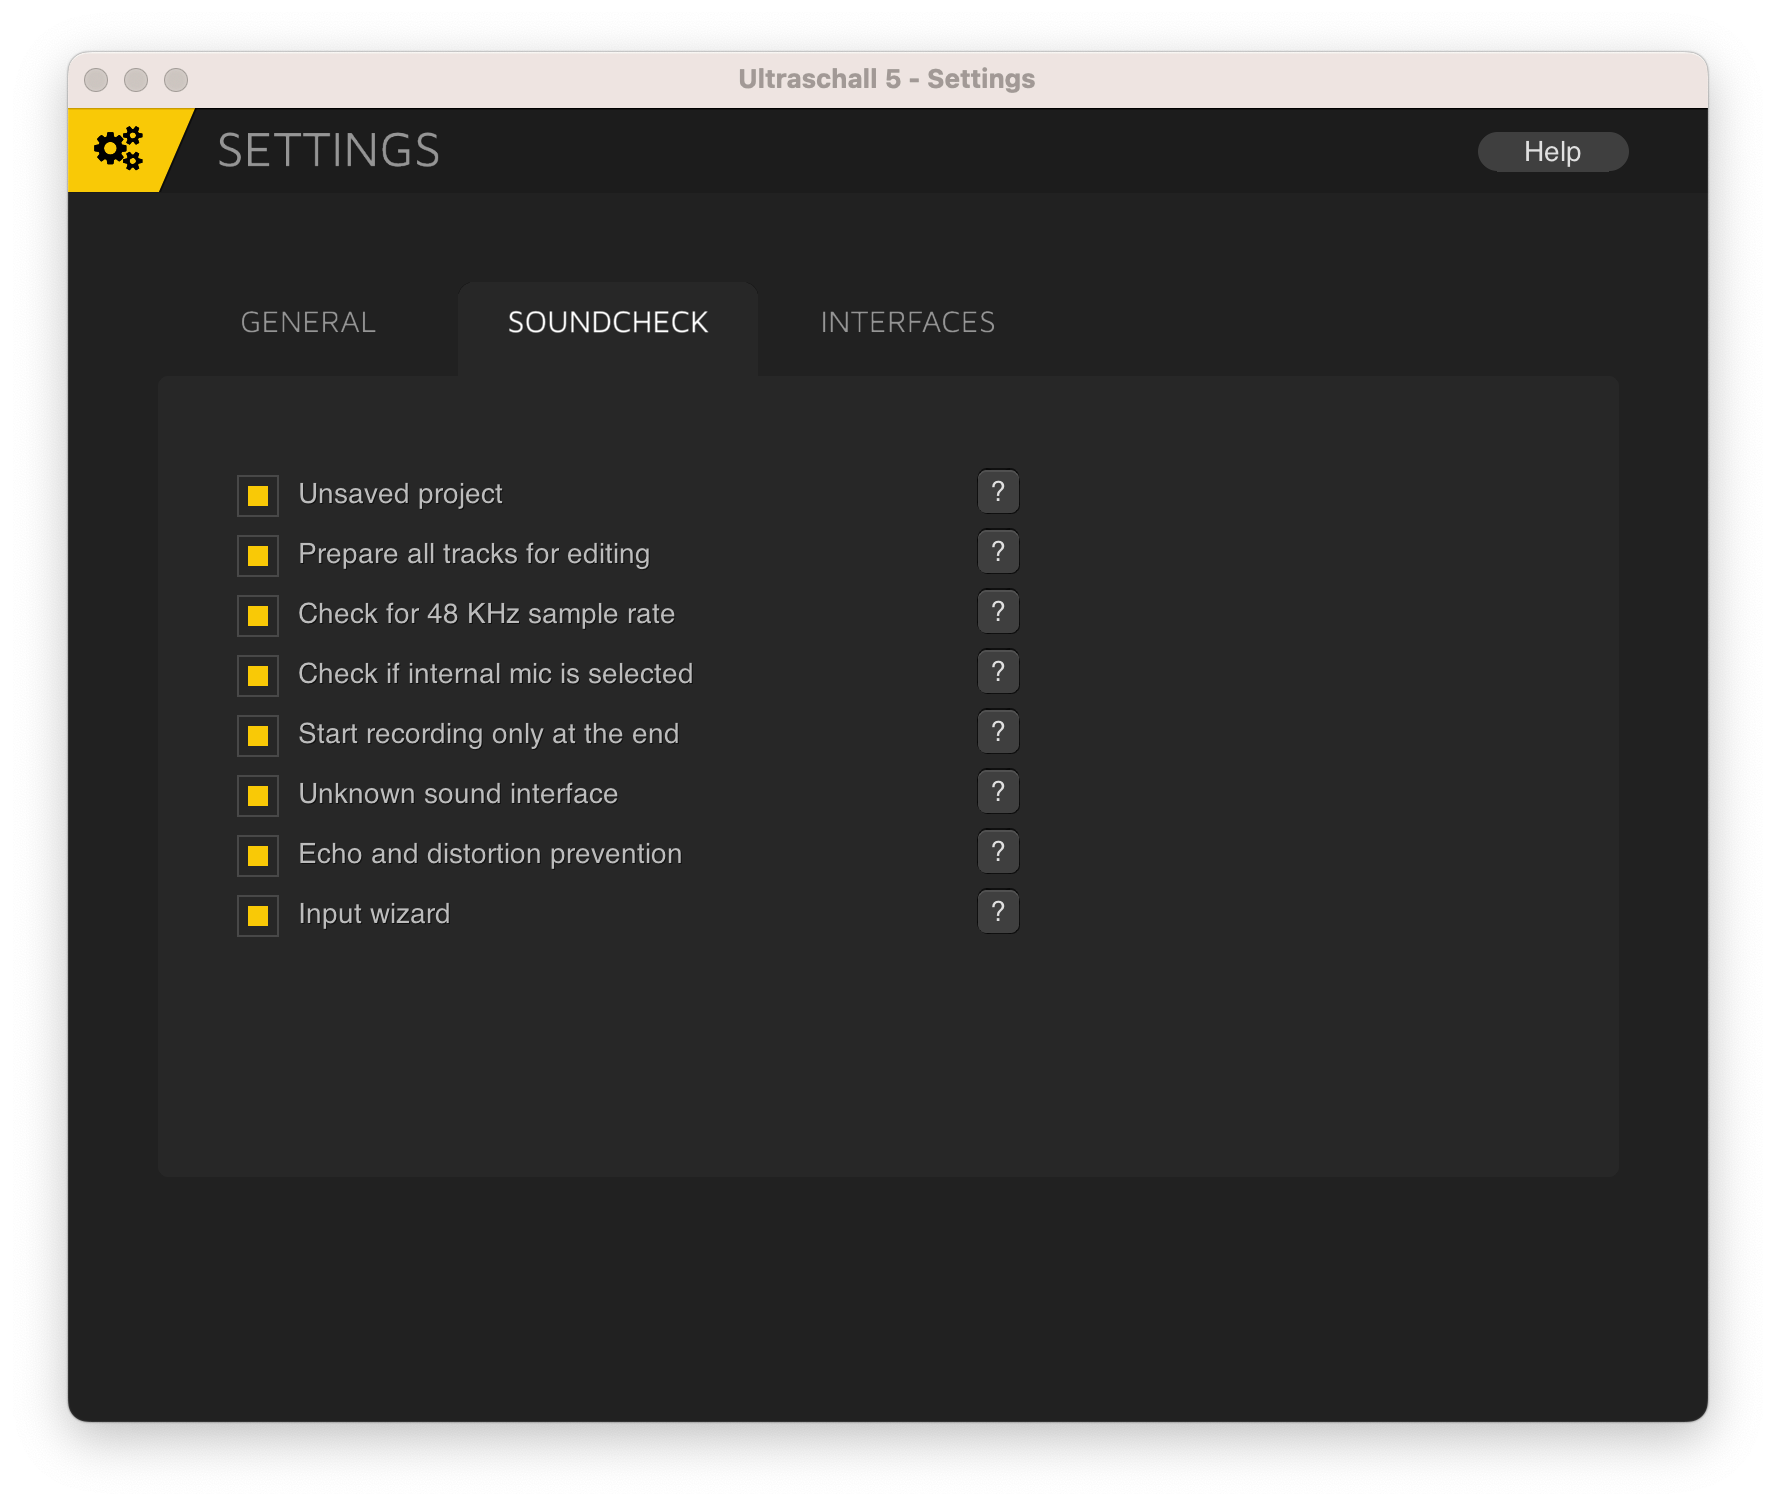
The Ultraschall Settings are displayed via the podcast menu or the keyboard shortcut ;. These are divided into three areas via tabs: GENERAL, SOUNDCHECK sowie INTERFACES.
General Settings
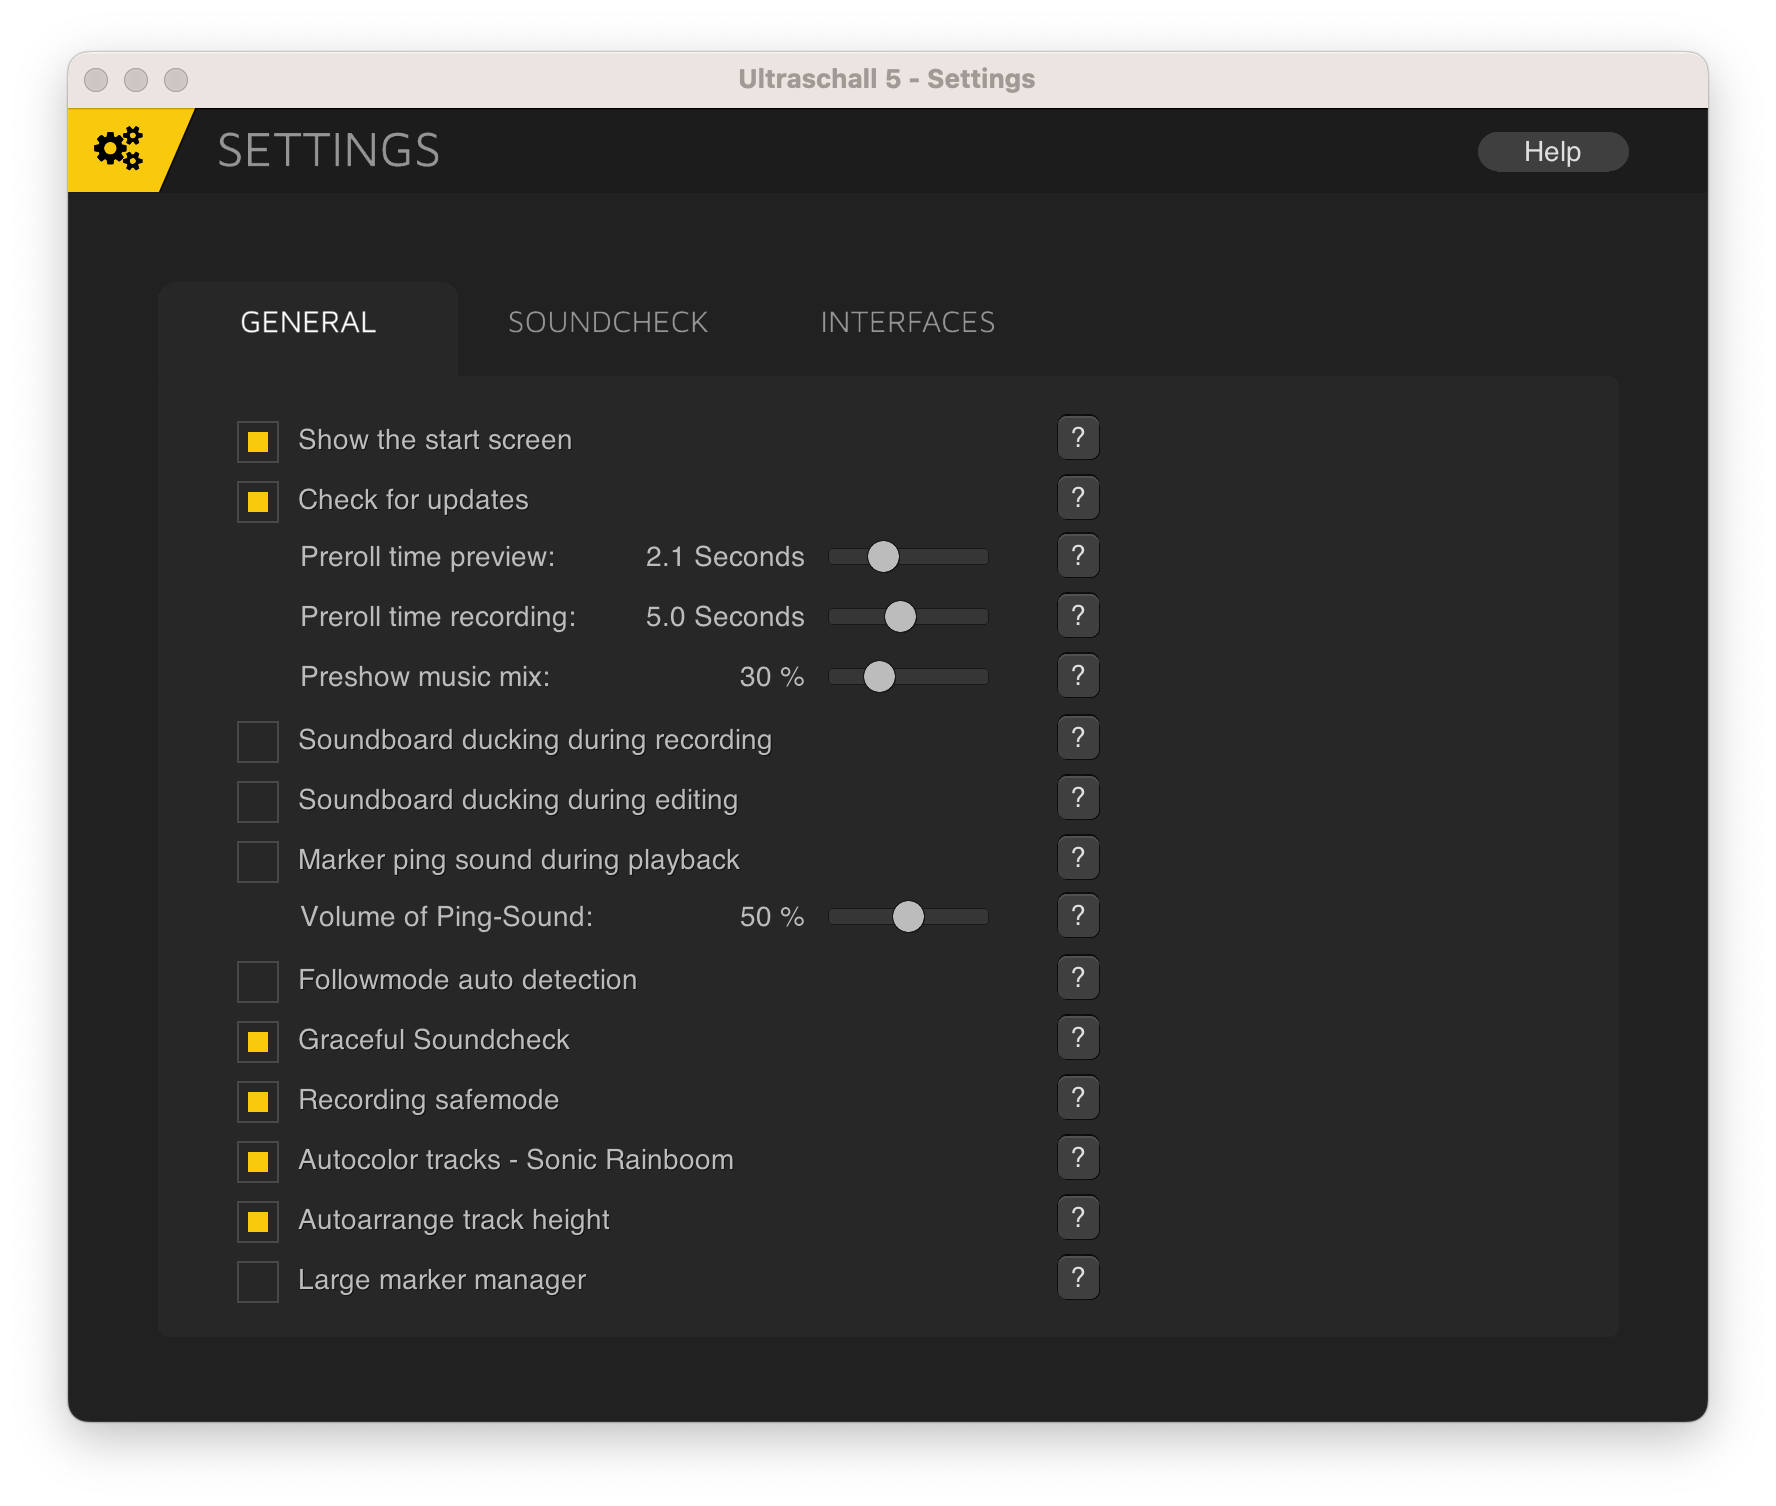
Following settings can be made:
- Show the start screen
- Show Ultraschall start screen on launch
- Check for updates
- Check for Ultraschall updates on launch. Only a message is displayed. No further data is transferred.
- Preroll time preview
- Set the time in seconds by which the program jumps back when the p key is used to preview cuts.
- Preroll time recording
- Set the time in seconds by which the program jumps back for a preroll recording.
- Preshow music mix
- Play some music from the Ultraschall-Soundboard in your preshow to entertain the livestream. If you choose the preshow routing preset, you can mix none (0) some or all (1) of the music to your headphones mix.
- Soundboard ducking during recording
- Activate ducking of the soundboard during recording. If anyone starts to talk to a microphone, the Soundboard track will be gently reduced in volume.
- Soundboard ducking during editing
- Activate ducking of the soundboard during editing. If anyone starts to talk to a microphone, the Soundboard track will be gently reduced in volume.
- Marker ping sound during playback
- Play a sound if a chapter- oder edit-marker is passed during playback
- Volume of Ping-Sound
- Set volume of the ping sound
- Followmode auto detection
- Turns off Follow Mode when clicking into Arrange View. Disable this if you encounter problems with the Followmode.
- Graceful Soundcheck
- Set all open soundcheck warnings to the ignore state by closing the soundcheck window.
- Recording safemode
- Warn about an unwanted stop of the recording after hitting SPACE or RETURN.
- Autocolor tracks - Sonic Rainboom
- New tracks get a unique color. Local tracks start with blue, remote tracks (StudioLink) will be orange and the Soundboard grey.
- Autoarrange track height
- Zoom or shrink tracks to fit the arrangeview|if new tracks or envelopes are added.
- Large marker manager
- Give way more space to the marker manager on the right.
Soundcheck Settings
Interfaces Settings for Direct Monitoring