Cut
Introduction
Once you have finished recording, the next step is usually to edit your podcast episode. In this chapter you will learn how to remove unwanted parts from your recording and how to add chapter marks to your podcast.
There is a very good tutorial video on this topic.
Important to know
Reaper cuts non-destructive. This means that your audio files are not directly edited, but remain unchanged. So you can't do anything wrong or break anything when editing. In an emergency, you simply make a backup - or if things get really bad, you start all over again. Since version 5, Ultraschall makes a backup of your project file (not the audio files) every 10 minutes and saves it in the project folder.
Restore backup: If you need this function right now, don't panic. Ultraschall makes regular and fully automatic backups of your project. These are located in your project folder under 'Backup' and are named according to the following scheme: '$Project name-$Date_$Hours$Minutes'. To restore such a backup, first close Ultraschall. Then open your project in the Finder or Explorer and copy the backup file with the appropriate timestamp from the folder 'Backup' into the project directory (i.e. one level up). It is best to rename this file directly and open it with Ultraschall. Done!
Prepare for editing. ("Prepare all tracks for editing")
Before you can start editing, you need to make a few preparations. Make sure that the recording is finished and not just paused. In order to relieve you of the following steps as far as possible, Ultraschall offers the function 'Prepare all tracks for editing'. You will find it in the menu under 'Podcast' > 'Prepare all tracks for editing' - at the latest, the sound check will remind you of this if you forget to prepare the tracks before editing. Prepare all tracks for editing' performs the following steps:
- The automation mode changes to 'Trim/Read' for all tracks or envelopes.
- All tracks and envelopes are deactivated for recording.
- All connections to StudioLink (if any) are removed.
- All StudioLink FX effects (if any) are removed.
- All soundboards (if present) are removed.
- StudioLink on-air streaming (if present) is stopped.
- All connections are routed to the master track.
- Routing is switched to edit mode.
Remember that 'Prepare all tracks for editing' terminates all StudioLink connections to your interlocutors! If you want to record something later, you can switch the track back to record and re-record something. Then you can run 'Prepare all tracks for editing' again.
As the last step in preparing the edit, you can now switch to the edit view. To do this, you will find the button with the scissors [17] in the left margin under Views - or you select Podcast>Screenset editing in the menu or press F9. This view improves the overview in your project - for example, through quick navigation at the top of the screen.
Single cut
Ultraschall offers you two extremely efficient tools for cutting, with which you can do 90 percent of the work. Learn these two methods first before moving on to fine-tuning with the advanced tools:
Cut across all tracks (ripple cut)
With the so-called ripple cut, you cut all tracks at the same time. This prevents content from shifting and the tracks from no longer lying correctly on top of each other. To use the function, drag a selection in the Timeline [23] over the area you want to cut. Then click on the Ripple Cut Button [7] or Cmd/Ctrl + X.
Mute disturbing passages (Mute)
If you don't want to cut sequences from your tracks, but you still don't want them to be audible, the best way to do this is to use the mute function: To do this, select the track(s) you want to edit and press Cmd/Ctrl + Y. If not already present, a mute envelope will appear under the selected track. The orange line of the mute envelope shows a valley in the progression form at the point you selected before. This envelope works according to the binary principle: If the line is up, the corresponding track can be heard; if the mute line is down, nothing can be heard on the assigned track.
You can also add further points to the line in the envelope and mute - or unmute - them with the mouse at the desired points. A double-click creates further editing points, which you then only have to drag up or down.
The fastest way to edit the mute envelope is with the mouse: If you want to change from "audible" to "inaudible" at a certain point, you only have to click in the mute envelope in the lower half of the envelope. This is only possible if the line is at the top at this point (and it makes sense that there is no editing point there yet). For the change from "not audible" to "audible" the procedure is analogous, but of course you have to click into the upper part of the envelope.
Advanced cut
Split Items
With this function you split an item into two items. To do this, place the edit cursor where you want to split the item and click on the split button[5] - or press the S key.
Soft fade-in and fade-out
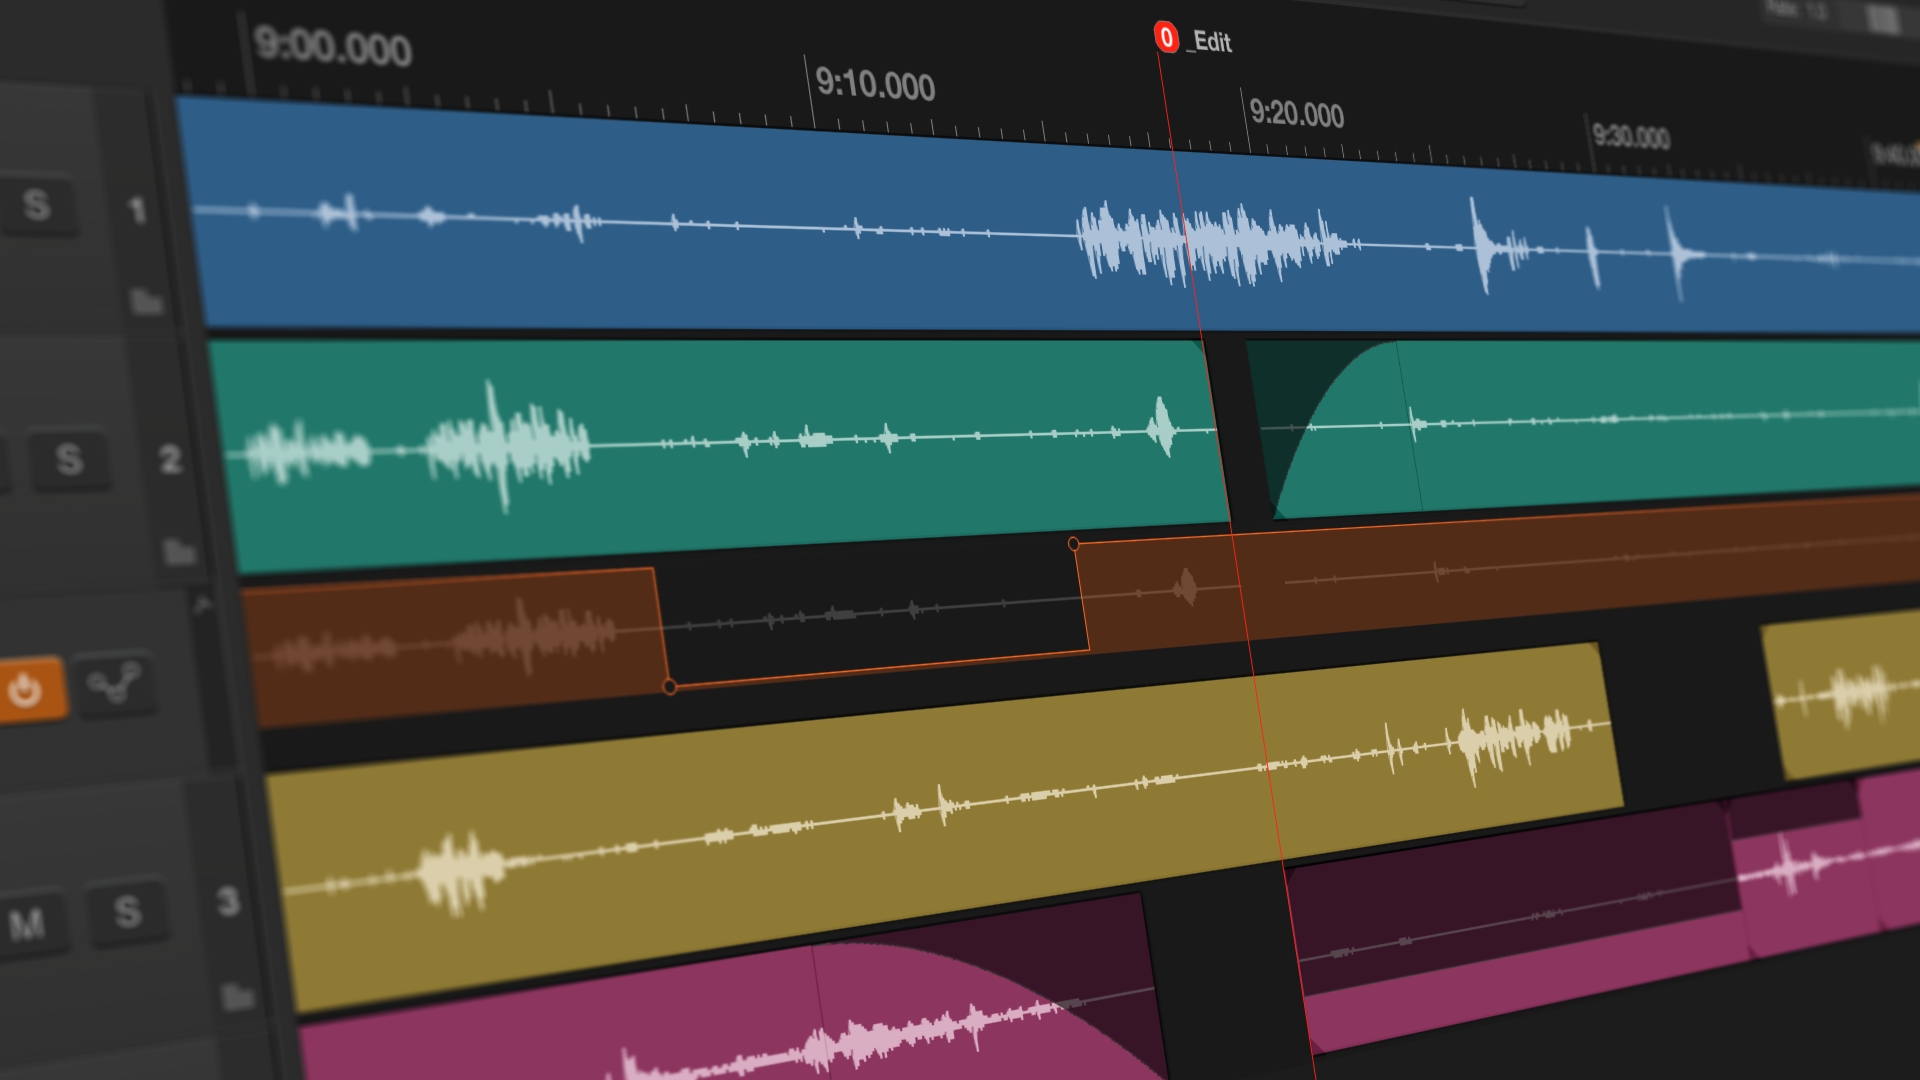
If you would like to gently fade in or out the volume at the beginning or end of an item, go with the mouse over the upper left edge of the item in the timeline area [23]. Then you will see that your mouse pointer changes into a curve. Now you can click and drag - and thus determine the fade or its duration. You can also do the same at the top right of each item.
Chapter marks
In Ultraschall, you simply set chapter markers, which later (in most podcatchers) make it easier for your listeners to navigate within your episodes. For production, Ultraschall distinguishes between two types of markers: chapter markers and edit markers. You set the chapter markers via the M key or the corresponding button [3] - these are the markers that will also appear later in the podcatcher. But you should also name the markers. Either later in the marker dashboard or by directly setting a named marker with Shift + M and assigning a title.
You set the edit marks with the [4] button or the E key. They are only relevant and visible to you during the edit so that you can mark places in the project and easily find them again later. They are not exported.
Regions are also ignored in the podcast export. However, you can use them to divide your audio material into different sections (for example, if you are cutting several episodes from a long recording) and then export these sections or regions as individual files using the export assistant.
Marker Dashboard
Open the marker dashboard with Alt + Shift + M or by pressing the corresponding button [19]. There you manage, name and export your chapter markers.
Region/Marker Manager
You will find the 'Region/Marker Manager' in the Chapter Marker Area [28] at the bottom right. This area is shared by the Routing Matrix [27], the Filter [26] and the Chapter Marker Manager [28]. In the marker management you see all markers - both chapter and edit markers. You can edit them by double-clicking on the name field - you can set the colour of the marker by double-clicking on the field in the last column.
Photos
Optionally, you can also add photos to chapter markers, which are then displayed to match the currently playing chapter, provided the podcatcher supports this. Supported formats are .png and .jpg. You simply drag and drop the photos into your project onto a separate track and place them there at the desired location. A chapter marker is automatically added to each picture, but you still have to name it afterwards.
URLs
In addition (and also optional), you can also provide each chapter marker with a URL. You can also use the marker dashboard for this. Note: The '+' to add a URL in the corresponding field only appears if the chapter marker also has a name. Unnamed and therefore incomplete markers cannot have a URL added.
Button overview
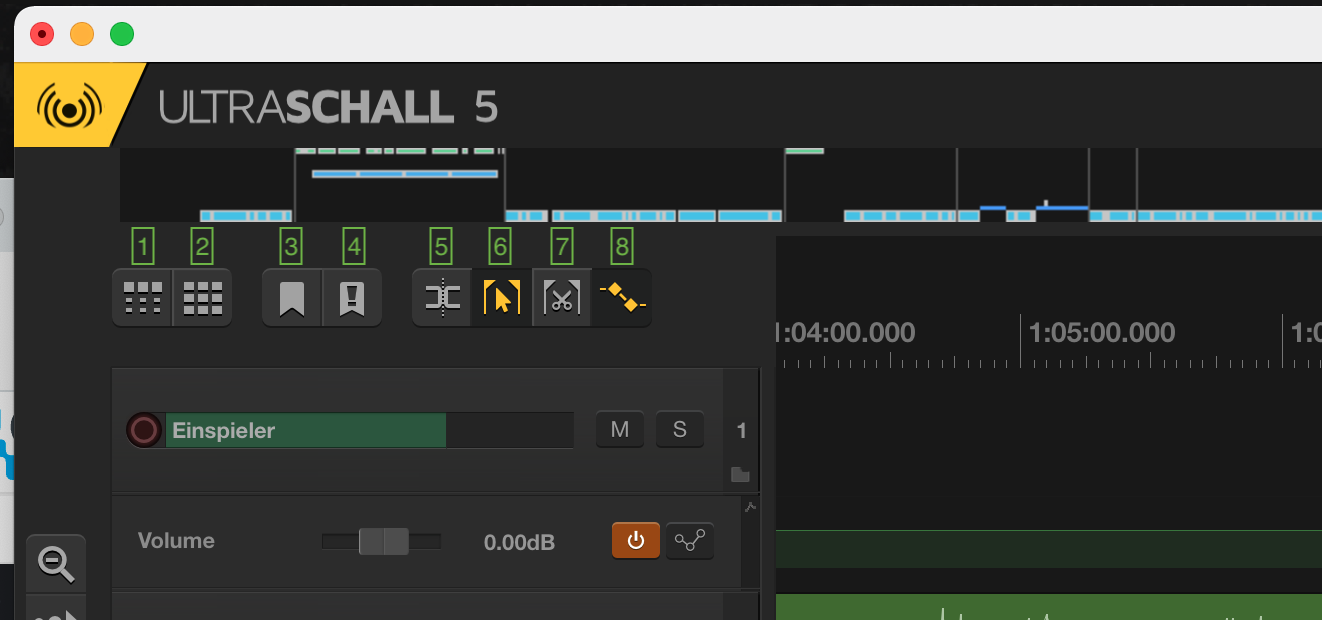 The buttons [1-8] in the top left-hand corner influence what happens when you click the mouse in the track area and drag it while holding down the mouse button: As in a word processing or other editing programme, the default setting is that you select a range. However, you can change this behaviour at the touch of a button and adapt it to your way of working - or by holding down the Alt or Cmd/Ctrl key you can change the behaviour for the current action only.
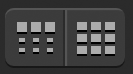
[1] and [2]: Ripple Editing
The ripple behaviour determines what exactly happens when you move (or remove) an item on a track during editing - and whether and how this affects other items on the same and the other tracks:
- No ripple**: The buttons [1] and [2] are not active (grey); if you move an item on a track, this has no effect on other items or tracks.
- Ripple per Track**: Button [1] is active (orange); if you move an item, all subsequent items on the same track will also move - if you have selected more than one item on different tracks, all subsequent items on all affected tracks will move.
- Ripple all Tracks**: Button [2] is active (orange - button [1] is ignored at this point); if you move an item on a track, all subsequent items on all tracks will also move. By default, ripple is deactivated for all tracks (buttons are grey).
 Ripple Editing: _The buttons [1] and [2] influence the ripple behaviour when moving audio parts.
[3] and [4]: Marks

Button [3] sets an (unnamed) chapter marker at the current position of the play cursor - Button [4] sets an edit marker. You can find more on the topic of markers in the section [Chapter markers](#Chapter markers).
[5]: Split

Button [5] splits an item at the current cursor position. For more information, see the section Split Items.
[6]: Mouse Selection

The button [6] activates or deactivates the mouse selection mode and thus influences the mouse behaviour:
- activated: If you click on an item, hold down the mouse button and then drag the mouse, you select the affected area.
- deactivated: If you click on an item, keep the mouse button pressed and then drag the mouse, you move the selected item.
[7]: Ripple Cut

Button [7] corresponds to the key combination Cmd/Ctrl + X - with this you cut the selected area out of your recording across all tracks. All subsequent items move to the left to close the resulting gap.
[8]: Show Mute Envelopes

Button [8] shows or hides the mute envelopes of all tracks. See the section Mute for more information.
Moving items (track contents)
If you want to move individual elements ("items") on your tracks in the Timeline [25], you should proceed extremely carefully - it happens very quickly that synchronously recorded tracks "slip" as a result. When listening, you will notice that the timing no longer fits: The speakers interrupt each other, pauses occur that were not there in the recording, and so on.
The behaviour of the individual items when they are moved is determined by the [Ripple Setting](#Ripple Editing). However, you can temporarily influence the ripple behaviour only for the current action by performing the action with the Alt or Cmd/Ctrl key pressed:
- Alt (Mac/Windows/Linux) Hold down and move the item: You move only the selected item(s).
- Press and hold Cmd (Mac) or Ctrl (Windows/Linux) and move the item: You move the selected item(s) and ALL items behind it.
Insert audio content into the project afterwards
To add more sounds or recordings to your project after a recording, simply drag and drop the desired files into your project. If you drag the file into the timeline area [25] to a place in the project where there is no track, Ultraschall automatically creates a new track with the contents of the file (and names it after the file name). This way you can also embed whole Ultraschall projects (.rpp) into other projects.
Under the menu item Edit>Project Settings you set how Ultraschall should handle added media files. Here we recommend the setting 'Copy media to project' in any case. It is best to check the box Copy imported media to project media directory directly in the global REAPER settings under Options> Preferences under the item Media. Otherwise it can happen that you unintentionally have references to files in your project that are not in the project folder - and then cause problems at the latest when moving or copying the project.
Cut, copy and paste
To cut or copy audio within your project, select the item to be copied or set a time marker. If you then right-click on the selected area (or open the 'Edit' menu), you can either copy the whole item (standard behaviour; also via Cmd/Ctrl + C) or the selected area within an item. Cutting works in the same way.
To paste copied or cut content, click in the left track area [23] and select the track where you want the content to end up. Then place the cursor at the desired position and select 'Paste' either via the 'Edit' or the context menu - or via the key combination Cmd/Ctrl + V.
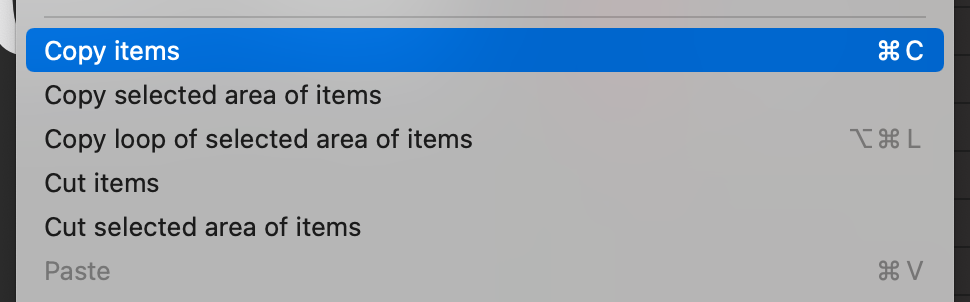 The context menu has various copy and cut modes.
Double-ender recordings
If your fellow cast members are connected to you via StudioLink via a poor or unstable internet connection, it makes sense for them to run a local recording in their StudioLink standalone clients as a precaution. To do this, they click on the 'Record' button in the StudioLink browser window. The file that must later be sent to the editor can be found in your own files in a studiolink folder and there in a subdirectory with a recording time stamp under the file name local.flac.